When we first launched our Whatnot integration, the only sales data available to Whatnot sellers was their Ledger history. Customers could download those reports and then upload the CSV-formatted files to Seller Ledger. Since then, Whatnot has added weekly order reports, which provides much more transaction detail, including:
Item prices
Coupon costs
Shipping costs
Commission fees
Payment processing fees
To take advantage of that, Seller Ledger has rolled out new functionality to automate Whatnot accounting. Customers no longer need to download files from Whatnot and upload them to Seller Ledger. All of that is taken care of.
How to automate your Whatnot accounting
In order to fully automate your Whatnot account within Seller Ledger, you only need two things:
1. You should use the Chrome browser when accessing Seller Ledger so that you can also make use of the second tool (below.)
2. Once you are using Chrome, you will want to install Seller Ledger’s custom-built Browser Extension. This extension allows Seller Ledger to automatically pull down and import the proper transaction details.
Recently, we wrote about how folks who source on eBay can track their purchases in Seller Ledger. Well, we’ve also heard that more and more resellers are sourcing from Whatnot, a fast-growing live-streaming sales platform. We already make it possible to import your Whatnot sales into Seller Ledger, but today, we’ll show you how to create inventory from your purchase history.
Step 1: Get your Whatnot purchase history in the right format
First, you’re going to want to download your Whatnot orders report for a given period of time. It will come in a CSV file format that, then you open it in a spreadsheet, will look something like this:
The goods news is, because it’s already in a CSV file format, you only need to make a few changes and it will upload to Seller Ledger just fine.
Step 2: Remove and rename columns
The vast majority of the columns in this file won’t be needed for uploading inventory. You can simply delete the following columns, which are not supported by our inventory upload feature
order id
order numeric id
buyer
seller
product description
product category
processed date
order status
order style
order currency
sold price
subtotal
shipping price
taxes
taxes currency
credits applied
Inbound cost of goods sold
Note: because the “total amount” column amount includes the inbound “shipping price” and “taxes” amounts, that “total amount” will be properly divided among the quantity of the items and be included in the item costs.
Keep the “product name” column header as is, as well as the header for “quantity.” But rename “total amount” column header to “total cost” to match the column headers we require.
Step 3: Create unique SKUs for each product
The most important step now is to add a new column, titled “sku” and to create unique SKUs for each item in this file. Then, when you list them on various platforms to sell (and include the corresponding SKU value,) Seller Ledger can tie the sale back to the original cost, reduce your inventory and properly calculate cost of goods sold.
Step 4: Upload your inventory to Seller Ledger
Lastly, to load this cost information into Seller Ledger, just go to the Inventory tab and click the “Add Inventory” button. Record the date that you are uploading this information, “Whatnot” as “Purchased from” and enter the total amount of all of the items (which you can add up in the spreadsheet.) Then click the button near the bottom of the screen that says “Upload inventory”, choose the file, and click save. Within a few minutes, it should show as a single large purchase of items with all of the cost details broken down.
That’s it. Happy sourcing on Whatnot. May your profit be ever increasing.
We are excited to announce that Whatnot sellers can now import their “ledger” details into Seller Ledger.
While Whatnot does not yet provide a public API (which means we can’t automatically grab your transaction history like we can with Amazon, eBay, Etsy and Shopify,) they did release the ability to export ledger details in CSV format earlier this spring. We can import these files directly into Seller Ledger, like we do for both Poshmark and Mercari.
Step 1: Download your Whatnot sales history
Go to Seller Hub, under Financials, and then under Ledger – you should see an option to export your history in a CSV formatted file. Go ahead and download and save that file.
Step 2: Add a Whatnot account in Seller Ledger
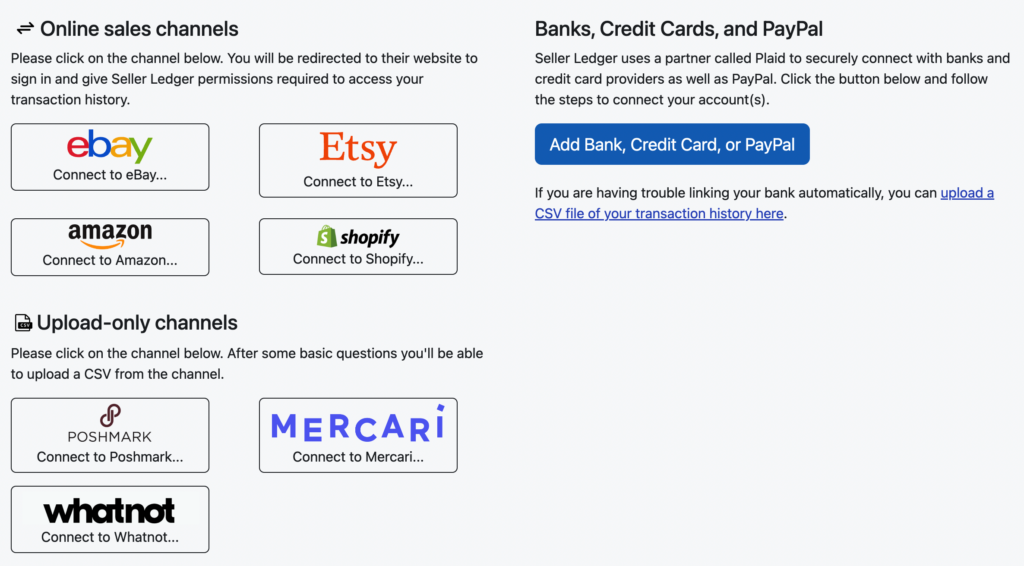
When you click the “Add account” button under Connected Accounts on your Seller Ledger dashboard, you will now see an option to “Connect to Whatnot.”
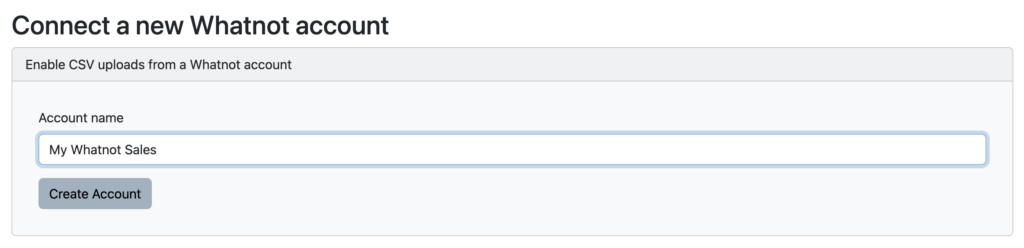
After clicking the Whatnot button, enter a name for your new account and click “Create Account”
Step 3: Upload your Whatnot ledger file
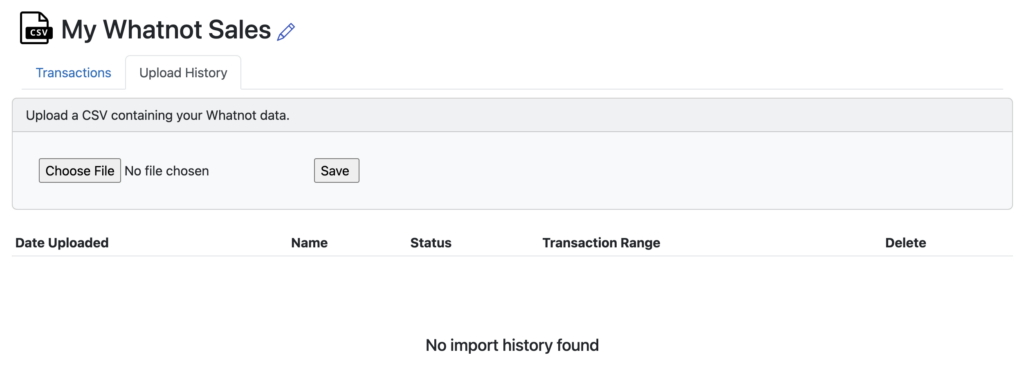
Once you’ve created your new Whatnot account, you’ll be taken directly into that new account, to a screen that allows you to upload your Whatnot ledger file. Choose the file you downloaded from Whatnot and click “Save.” Your file will be uploaded and your transaction history will be imported into Seller Ledger.
Trial users
If you are still in your trial period, Seller Ledger will only import the last 90 days of transaction history, regardless of how large your Whatnot file is.
Step 4: Categorize your Whatnot payouts properly
Whatnot currently pays sellers via Stripe (often to a bank account) and PayPal. If you link your bank or PayPal account to Seller Ledger, you’ll want to make sure that your payouts from Whatnot don’t get double-counted. So, when you see your Whatnot payouts hit your bank or PayPal account, make sure to categorize them as “Transfer: My Whatnot Sales” – or whatever you named your Whatnot account.
Step 5: Remember to regularly update your Whatnot sales in Seller Ledger
Because we can’t pull in your new sales and expense information on a dailybasis, you’ll want to make sure to come back every once in a while to upload your latest sales history. How often you choose to do so is your choice. We show the date of the most recent imported transaction on the Seller Ledger dashboard to help remind you.
Lastly, if you make a mistake with any of your uploaded information, it’s not a problem. The “Import History” tab shows you all of the files you’ve uploaded over time, with the ability to simply delete one or more and try again.
We know there are other channels out there that provide CSV files of transaction history. If you would like to see other channels supported, please request a new platform or email us at [email protected] with your interest and, if you’d like to be particularly helpful, a sample of a transaction history file from that channel.