Just Type in Item Costs to See Your Profit

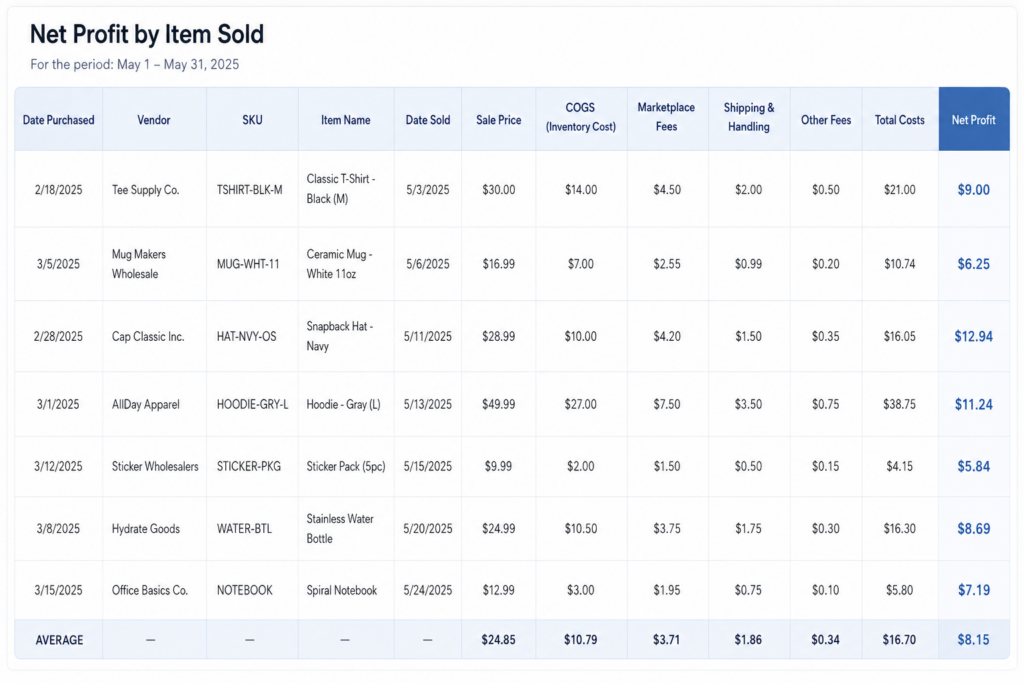
A lot of sellers would love to see how much profit they make on each product, but aren’t so excited to track every inventory purchase from acquisition through sale.

To help those customers, we’re pleased to announce a new option that allows any seller to simply type in item costs and see their profit on any sale, after it’s already been made.

How can I enter my item costs?

To be able to take advantage of this feature, you do need to turn on inventory tracking. While you will technically be using the “continuous” inventory approach, you can skip a lot of the steps.

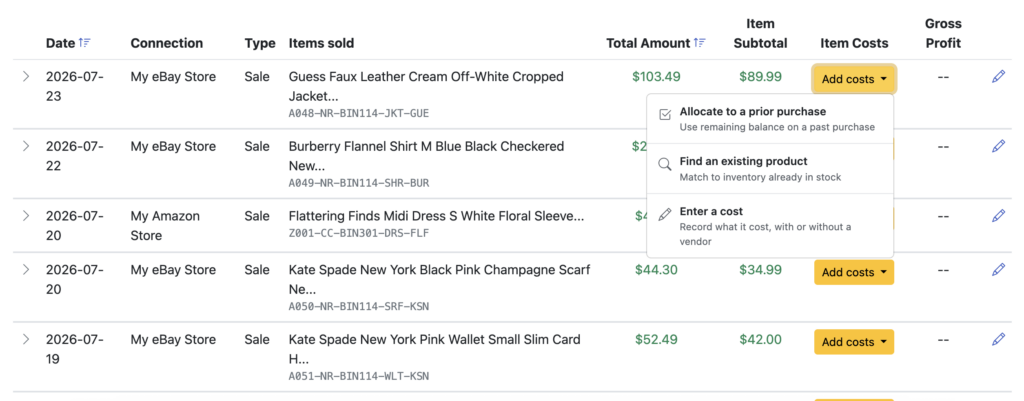
Once you have inventory tracking turned on, simply go to Inventory -> Sold and you’ll see a list of your recent sales, with an “Add costs” button in each row. Click on that button for a sale and choose the bottom option: “Enter a cost”

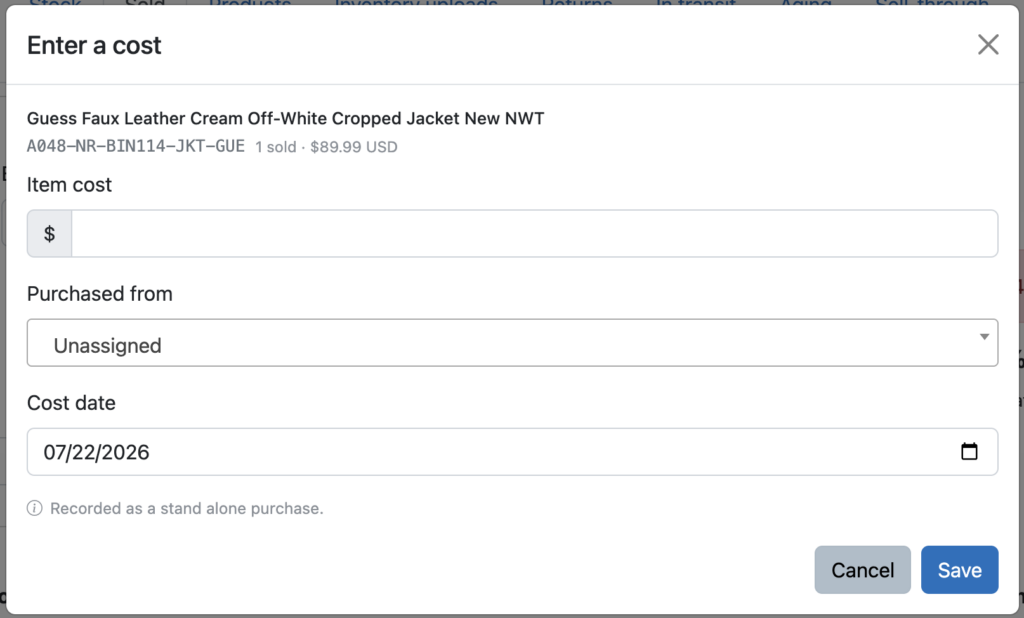
This will bring up a simple form where you can just record the amount you paid for that item, and we’ll handle the rest. You can also assign a specific vendor name and change the purchase date, but it’s your choice. If you want to simply type in the costs of as many items as you can, as quickly as you can – you can now do so.

As soon as you click “Save”, you’ll instantly see your gross profit. And your cost of goods sold will increase by the amount you entered.

Load Inventory Costs from Your Spreadsheet

If you have built or bought a spreadsheet template for tracking your product purchases and costs, you can now use that to get a jump start on automating your eCommerce accounting and getting better insights into your net profits. Seller Ledger now lets you upload inventory costs from your spreadsheet.

To start, this feature only works if you have inventory tracking turned on and want to see your profits at the item-level. If you are writing off cost of goods sold as you go, you’ll be more interested in just uploading a list of expenses.

However, if you’ve already been tracking each purchase and sale, you’ve made the investment to see your profitability per item.

How to upload your existing inventory costs from your spreadsheet

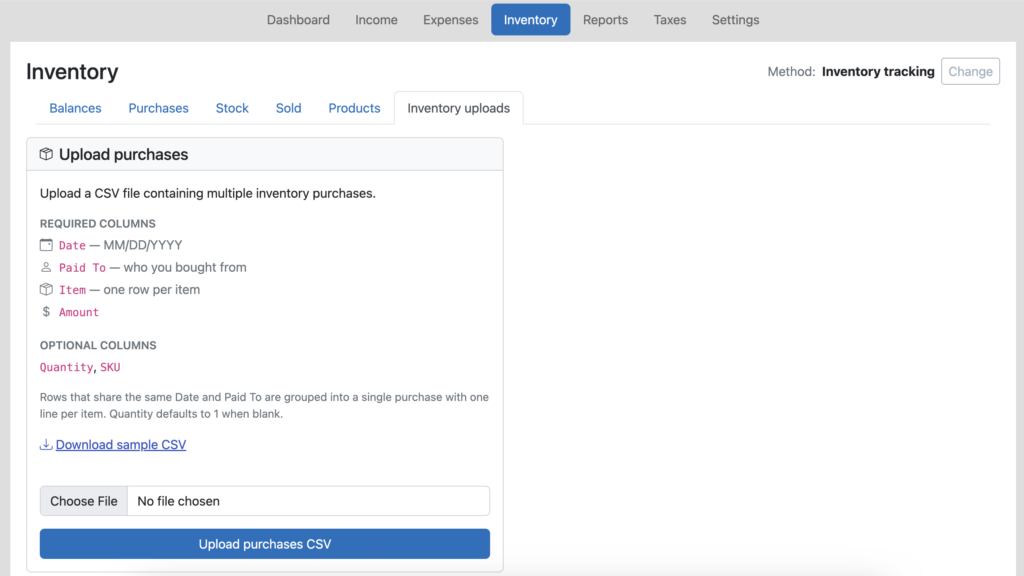
Just go to the Inventory tab in Seller Ledger, and you will see a new “Inventory uploads” sub-tab. Next, open your existing inventory purchase spreadsheet and save it as a new file, in a CSV format. And make sure to rename any of the columns to match our layout.

Pro tip

If you don’t already have unique SKUs for each item in your spreadsheet, we strongly recommend adding them. They are the secret to automating the matching of sales to cost, reducing inventory and calculating cost of goods sold.

That’s it. You’ve just jump-started your switch to a more automated method for tracking your profits on each sale/item.

Better Manage the Products You Sell

To better help you manage the products you sell, Seller Ledger has added a new view under the Inventory tab. In addition, for those of you who are not tracking inventory (i.e. using a “cash-based” approach) and writing off cost of goods sold directly, you’ll notice that the Inventory tab now has more useful features.

Finding your products

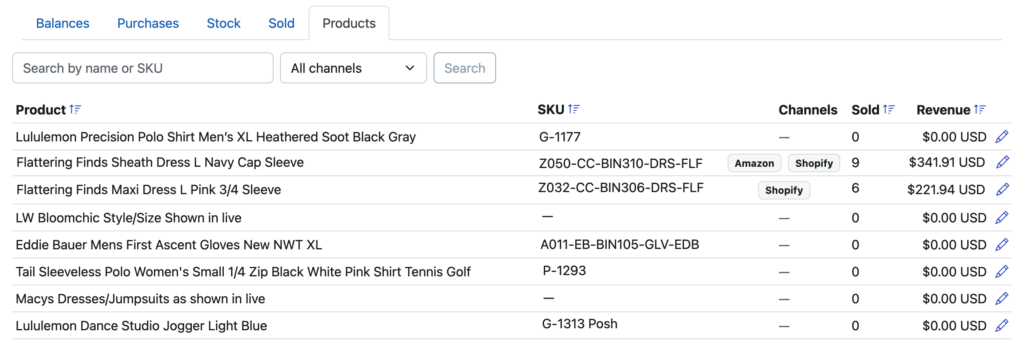
Clicking into the Inventory tab, you will see a new sub-tab called “Products”. For those of you already tracking inventory, it will show to the right of the other tabs.

For those of you writing off cost of goods directly, you’ll also have access to the new Products tab, just without the extra Inventory tabs:

Editing your products

Click into your products tab to a see a list of every product that you have either sold or loaded purchase/cost information for. We show you each product’s name, SKU, how much has been sold and on what channels.

You can sort by product name, by SKU, number sold or revenue.

If you have multiple copies of the same product that use slightly different names, now you can correct that. The same holds for cases where you are missing SKUs or using the same SKU for different items. Correcting those makes it possible to fully automate your cost of goods sold and see your profit per order.