Break a large inventory purchase into smaller items

Are you a card trader or someone who buys larger lots of items and breaks them into smaller groupings to sell? If so, we’re excited to announce some new capabilities to Seller Ledger’s inventory tracking. You can now break a larger inventory purchase into smaller items.

Thanks to all of our sellers on platforms like eBay, Whatnot, TCGplayer, Mana Pool and others for their suggestions.

To start, this feature is only available if you are using continuous inventory tracking in Seller Ledger. That’s because you’ll need to track the cost of the original item purchase before you can break it into smaller batches or individual items.

To learn more about how to record your item purchase, please read our support article here.

How do I break one item into many?

Once you’ve recorded your item purchase and loaded the costs for that item, simply go to the Inventory -> Stock page and find that item.
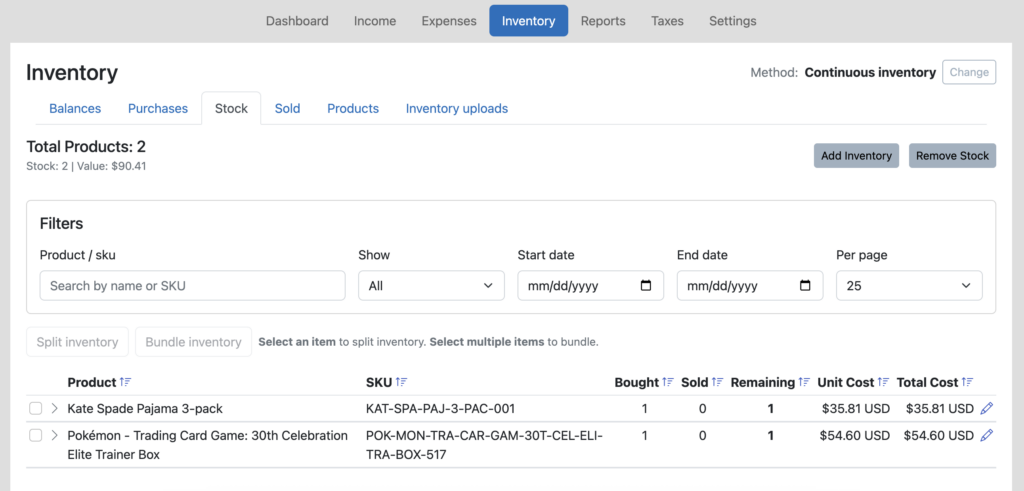
Then, select the item by checking the box in the left column. You will see the “Split Inventory” button change to active. Click that button.

This will bring up a form that looks just like the form to add costs to an individual purchase. But now, you get to record the individual items that you are breaking the larger item into.
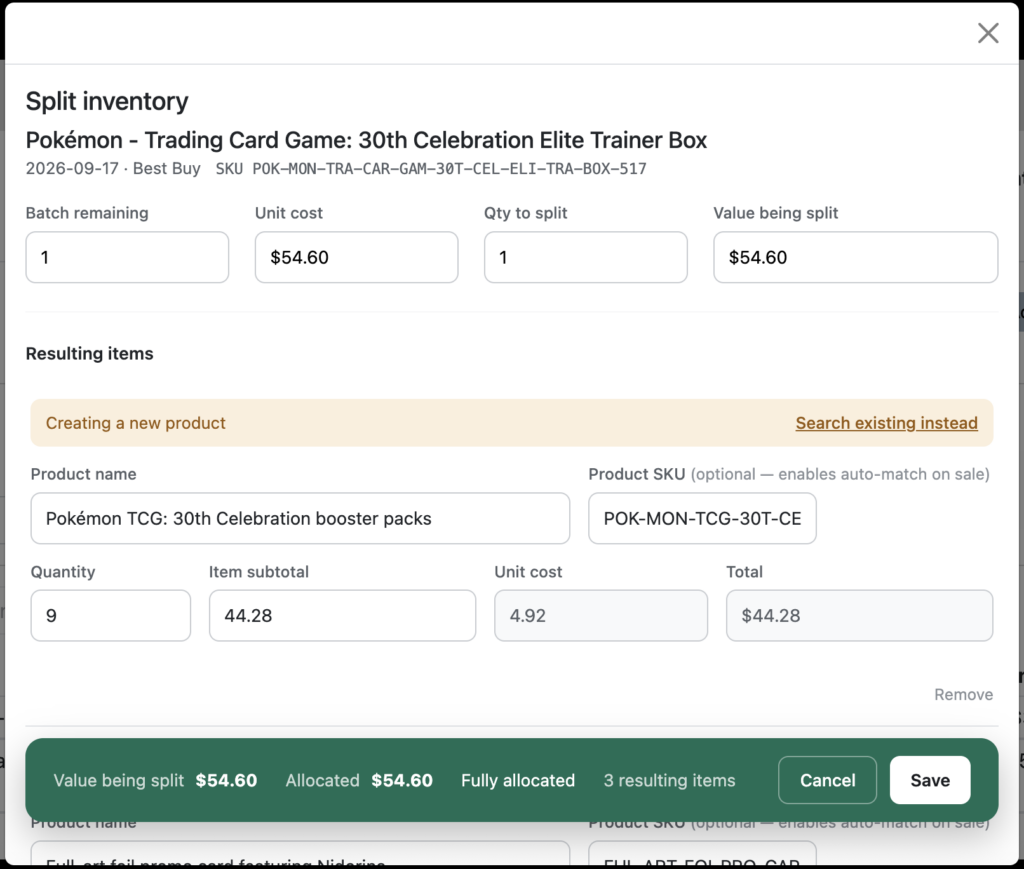
Make sure that the costs of all of the individual items sum up to the original item cost and click Save.

Cost allocation

When choosing the cost of each individual item, you’ll want to research IRS rules on cost allocation, often using fair market value or proportional allocation. Arbitrary cost allocation is discouraged.

You’ll now see, in your Inventory -> Stock view, that the original item is grayed out, but 3 new items have been added to your inventory, with the proper cost allocations.

Tying costs to their sales

If you use unique SKUs for each of the individual items you just created, and include them when you list your items for sale, Seller Ledger will automatically match the sale to these new, individual items using the SKU value, and use the cost of each of those items to update your cost of goods sold and reduce your inventory.

If you forgot to include the SKUs in your listings or otherwise need to match the sold items after-the-fact from Inventory -> Sold, you’ll see these individual items listed when trying match, not the original bigger box.

As with all new features, we welcome any feedback you have.

Move off Spreadsheets Even Faster – Upload Expenses and Income via CSV file

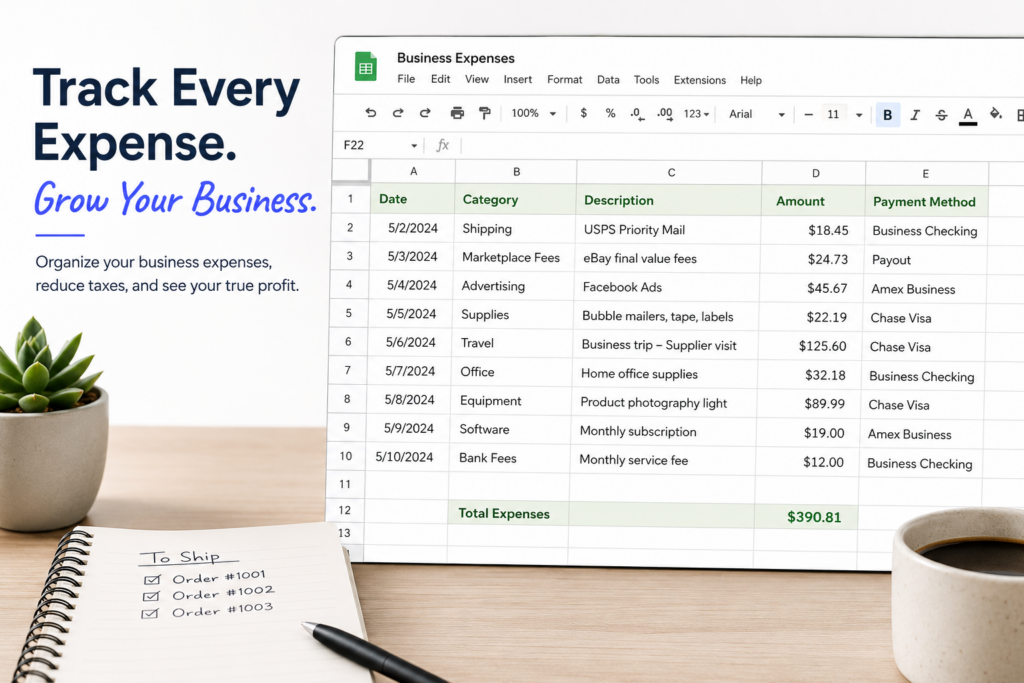
Have you been tracking business expenses in a spreadsheet for a while? Does the leap to traditional accounting software feel like more work than it’s worth? Well, no more.

In our never-ending quest to save sellers time, we’ve added the ability to upload expenses (and income transactions, if you so desire) in bulk, using CSV formatted files. Seller Ledger lets you keep all of that hard work and gives you a leg up when you want to try automating your accounting and bookkeeping.

Update

Since this article was originally published, we’ve released a much more flexible approach to CSV file formats. You can learn more about that here.

How to upload your expenses

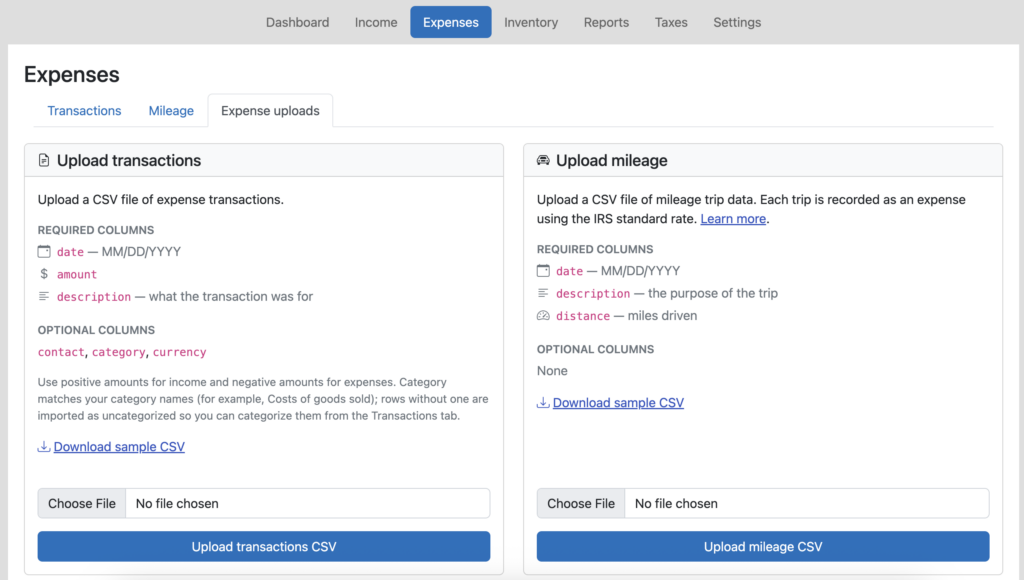
Just go to the Expenses tab, and you will now see a tab that says “Expense Uploads”. This is also where you can find the ability to upload many mileage trips at once.

Just follow the formatting guidelines on the screen (or take a look at our sample CSV template) and load your transactions. Plus, as an added bonus, you can include category names in there which, if they are the same as the ones you have in Seller Ledger, will group and total up your expenses and ensure they show up in the correct line of your tax report.

For income transactions, just do the same thing from the Income tab.

Simplify cost of goods sold if you don’t track inventory

If you don’t track inventory, but do have a running list of your cost of goods sold purchases, just include the “category” column and make sure to label those transactions as “Cost of Goods Sold.” Then check out how much more accurate your numbers look, including seeing your overall gross profit.

What if I do track my inventory?

As it turns out, we also offer the ability to upload your inventory spreadsheet too.

Stay tuned for more improvements in this general area. And keep sending us your feedback!

Automate Your TCGplayer Accounting

Based on popular demand, we’ve just released an update to Seller Ledger to help automate your TCGplayer accounting.

Do you sell cards from top games like Magic: The Gathering, Pokémon, Yu-Gi-Oh!, One Piece and Disney Lorcana? Well, now there’s an easier way to track your sales and determine your profits. Using our updated Chrome browser extension, Seller Ledger will regularly import the key information you need to determine the profitability and taxes owed for your business, including:

  • Card and pack item prices
  • Shipping collected
  • Commissions
  • Transaction fees
  • Item fees
  • Payouts

Plus, if you track your inventory costs with unique SKUs, Seller Ledger will automatically tie those sales back to the item costs, reduce your inventory and update cost of goods sold.

Seller Ledger matches payouts to your bank deposits

Seller Ledger does something pretty powerful when we import your sales, fee and payout history from TCGplayer. We compare all imported transactions from TCGplayer to the payouts we receive and make sure the sum total of all of the transactions in the payout match the amount of each payout.

We even organize your transactions into two sections when you click into your TCGplayer account: “Not paid out” transactions and “Paid out” transactions. In fact, from the TCGplayer account summary view, you can click into any payout to see every single transaction that makes up that payout. This makes sure that your financial amounts from TCGplayer are accurate.

Lastly, if you choose to link your bank account to Seller Ledger, we will also automatically match the payouts that come from TCGplayer to the deposits when they show up in Seller Ledger. These are properly treated as transfers, so you avoid any risk of double counting.

How to automate your TCGplayer accounting

In order to link your TCGplayer account to Seller Ledger, you need only do the following:

1. You should use the Chrome browser when accessing Seller Ledger so that you can also make use of the second tool (below).

2. Once you are using Chrome, you will want to install Seller Ledger’s custom-built Browser Extension. This extension allows Seller Ledger to automatically pull down and import the proper transaction details.

Once you are properly set up, Seller Ledger will regularly access your TCGplayer account and retrieve the order, shipping, commission, fee, and payout information.